The Craft In Me

A blog devoted to all my crafty endeavors.

Sunday, June 20, 2010

4th of July Appreciation!


Many of us, and I'm referring mostly to myself, take our freedom for granted too often. With Independence Day approaching, I came up with this chalkboard plaque to remind myself of the day-to-day things that I can easily take for granted. It's fun for my daughter too. It gives us a chance to highlight something daily or weekly to focus our gratitude on.


First I stared off with a wooden board from Hobby Lobby. It cost $2.99 which is not bad. But I can also picture this with a stressed and weathered piece of wood too, it could give a lot of character.


I primed the board first.


Next using a sponge brush I painted the wood red.


And then used chalkboard paint on the bottom half of the board.


For the flag written message, I initially wanted to use a patriotic scrapbook paper but surprisingly the craft stores did not have a large variety of patriotic paper.


So, I decided to print my own. I found some patriotic clipart that would also leave room for a visible message.


I came up with this “With My Freedom I Will...” message and added a few bulleted highlights.


I printed the clipart and message out on a colored printer.


Then used a couple of coats of mod podge to seal up the paper.


Linking to...

New Friend Fridays

MuralMaker and More

The Girl Creative Making


Keeping It Simple

BWS tips button The DIY Show Off

BWS tips button


 http://www.thethriftyhome.com NightOwlCrafting

Get your craft on Thurs.


Friday, June 11, 2010

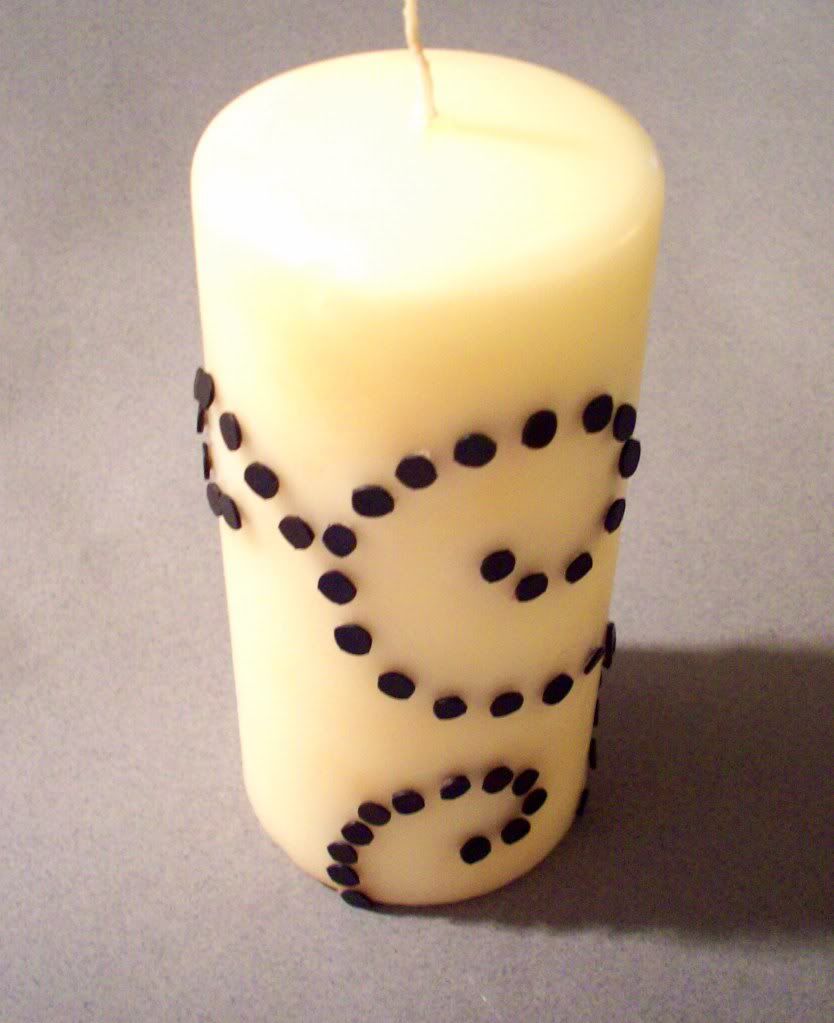
Wedding Candle


As I've mentioned before I have been on a candle kick but it seems to be slowing down, at least for the time being...


Ok, so I've always been a fan of crafts that are easy and simple yet leave stunning results, but this one is almost too easy. It requires no skill what so ever.


Up to this point I've liked the fact that my candles so far have all been burnable, this one, not-so-much. It's one of those just for show candles. And it's too pretty it be burned anyway.


I can picture this candle placed on a mantle with a framed wedding picture surrounded by some wedding keepsakes.


For this project, I used a white pillar candle which stands about 8 inches tall.


For the decorations, all I used were these stick-on rhinestones I found in the scrapbook section at Hobby Lobby.


The pack contains 4 different swirly designs.


The rhinestones are all connected so you don't have to worry about placing each individual stud.


All you do is peel and stick – literally – and you're done!


I think it's a bit more sparkly in person, but you get the picture. :)


Linking to...

Keeping It Simple

Sister Sister Sunday

UndertheTableandDreaming


BWS tips button


The Girl Creative

Making

The DIY Show Off


 http://www.thethriftyhome.com

Decor Mamma


Sunday, June 6, 2010

Copper Textured Earrings


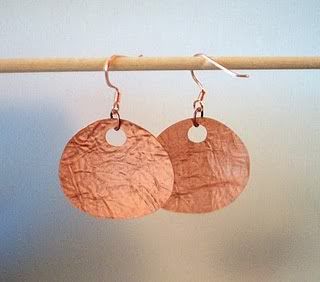
These copper disc earrings are simple to make and turn out fabulous.


Materials:


Copper sheet


Hammer


Scissors


Hole punch


Copper Earring components


First I started off using the same copper sheet used to make my copper candle.


Cut a piece of copper about 5" x 3".


Next I crinkled and wrinkled the paper in several places.


Unfold and re-crinkle to get folds all over.


After unwrinkling and laying flat, I then placed the copper sheet on a hardback book and began hammering away.


Here is the result.


To get a bit more texture, I repeated the crinkling and hammering process a couple more times.


To make a circle, I just used the top of a spray glue can as my template, but you can of course find any template to fit your size.


After tracing the template, I cut out the circle with scissors.


Using a paper hole punch I made the earring hole.


Because the hole punch leaves a slightly protruding edge around the hole, I hammered it to make it flat again.


To add some interest, I then created a slight curve to the disc just using my hands.


You can also gently press the disc against a bottle to create a curve.


Lastly, add a copper jump ring and an earring hook.


Simple and classic. Copper is such a beautiful material to work with, there are so many possibilities. I can see these nicely paired with some turquoise.

Now of course you can create an endless array of forms; oval, squared, you can even layer them too.


Enjoy!


Linking to...

The Girl Creative UndertheTableandDreaming

Keeping It Simple

Making


BWS tips button


BWS tips button


NightOwlCrafting  http://www.thethriftyhome.com


Get your craft on Thurs. giveaways