The Craft In Me

A blog devoted to all my crafty endeavors.

Monday, November 15, 2010

Good News to Share

I will be moving into my very first home within the next few weeks! Which of course, means packing, organizing, cleaning, tossing out junk and much more packing.

This house is truly a blessing straight from God and I am so thankful my daughter and I will finally have our own home.


I am taking the next few weeks to focus on preparing for this new adventure. But rest assure I will have many crafty posts soon after we settle in!

Jalinda

Tuesday, November 2, 2010

Easy Ornament for Christmas


Recently I was doing my weekly stroll through Michael’s eyeing all of the Christmas ornaments and came across a lovely glittered wire sphere shaped ornament. And of course I said to myself, as I so often do, “I can make that”.

My version is not a sphere but that’s definitely on my list to do.

Here is my take and, yes, it was too easy!


All I used is this thick copper wire, I think it’s .36 gauge. This particular wire I got from Hobby Lobby in the section where they sell clock mechanics. It comes in a thin tube and it’s about $10 for about 10 sticks.


So using my jewelry pliers I formed my curly swirly, which took all of about 5 minutes.


Then I sprayed it with adhesive. It’s best to hold the wire by a hook because this adhesive is very sticky. And making sure to spray at all angles so all sides are covered.

Then you simply sprinkle on the glitter.


After the first coat, I sprayed with more adhesive and added more glitter.


I applied about 3 coats in all.


It’s so sparkly and lovely, I can’t wait to try other colors and shapes!


Linking to...

BWS tips button

handmade projects

Birthday Wedding cakes crafts parties


NightOwlCrafting


ILoveTrendyTreehousePolaroid  http://www.thethriftyhome.com


Tuesday, October 26, 2010

Updated Picture


I originally bought this picture from Family Dollar a few years ago which in fact they have some really nice pictures and frames under $10.This picture has been hanging in my office at work for a few years now.

I have always loved it, but it was time for an update.

Removing the backing was a little difficult but I eventually removed all the innards and got to work.

Using the same technique as my
clock and pot I spruced up the outer and inner frames in red.

I then used black and silver paint and brushed over the middle pottery picture.


I really liked the pattern of the 4 squared papers on each corner so I wanted to keep that theme.


Using red and a contrasting sage scrapbook paper, I glued those in the corners.


Next I found a Fleur de lis image online and printed that out.


The fleur de lis was cut out on this silver crinkled paper.


Then I distressed the edges with more black paint.


Using mod podge I glued the Fleur de lis to the middle.


Near the very end, I decided it needed a little more something. Since the backing was basically made of cardboard, I pressed 4 upholstery tacks in the corners and 3 on the Fleur de lis. I also added some black embossing powder around the Fleur de lis to make it pop.


All in all, I think it turned out well!


Linking to...


BWS tips button Birthday Wedding cakes crafts parties


handmade projects NightOwlCrafting


Sunday, October 10, 2010

What to do with a cracked mirror

Two solutions for a cracked mirror:


This mirror got cracked a year ago during a move. Granted the mirror has only one crack and it’s in the corner, but I still could not live with this imperfection. I also could not throw away a perfectly good mirror so there had to be a clever way to save it.

My first solution was to hide the cracked portion behind some curtains. Giving it sort of “window” feel. It was easy enough, I just hung a curtain rod and curtains like a regular window and easy peasy, no more crack.


But knowing that I wouldn’t be keeping this look for long there had to be another way to disguise the imperfection once more.


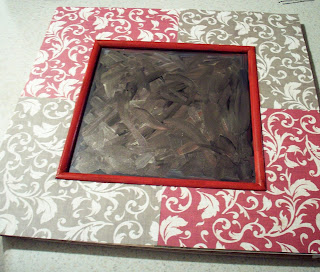
Initially, and I still may end up doing this, I was going to mod podge some fabric along both sides of the mirror which would hide the crack and still be attractive enough that it would just look like a decorated mirror. But, I could not find just the right fabric I had rumbling around in my head. So, I’ll wait till the right print comes along and then go for it.


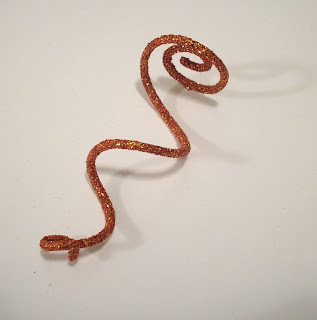
Meanwhile, my creative juices searched another pathway to ingenuity. I don’t remember how I came to this conclusion but I decided to use paint.


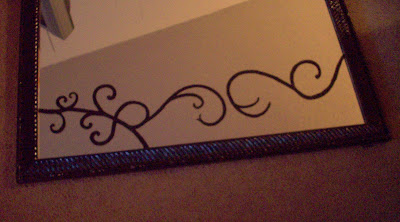
Since I’m a lover of swirlies and scrolls I could simply incorporate the crack right into a nice swirl pattern! Yes, this could work!


Oh, and I painted over the golden frame too. The mirror did not start out gold, I had been using this golden glaze on everything around the house and the mirror was one of the many victims.


Using regular craft paint, I painted the frame and the swirls black.


Painting on a mirror is somewhat challenging because I couldn’t pencil in a sketch first so I painted free hand.


Painting right along the crack. You can't even tell it's there.


I'm not quite finished and will post complete pictures when it's all done, but what a perfect disguise!


Please excuse the not so clear pictures. Photographing a mirror has no perks! The only way to get a halfway decent shot is to lay the mirror on the floor because it will give somewhat of a plain background.


But like I mentioned, I'm not finished, it definitely needs more swirls and a spritz of Windex.


I could have done both sides but I really liked the one side deal, it adds a bit of artistry, don’t ya think?

Linking to...

The DIY Show Off The Girl Creative


Keeping It Simple


mmm button

BWS tips button Texas Monkey

Photobucket


Photobucket BWS tips button

NightOwlCrafting Get your craft on Thurs.


 http://www.thethriftyhome.com

Beyond The Picket Fence


Chic on a Shoestring Decorating

A Little Knick Knack

http://www.decormamma.blogspot.com/