So I've taken a long blogger break, which was very much needed. But I'm back now to bring you a post that I'm excited to share.
I had an inspiration the other day while wondering through Kirkland's. This picture with a simple iron design in the center. So I whipped out my phone and took a quick photo.
The iron in the photo probably wasn't real but what we're going for here is the "look" of iron.
I've had the idea for a while to cut fun foam into an iron look and this design fueled my fire.
Now, usually this fun foam comes in thin sheets but I found this thicker sheet at Michael's. It' about 1/4" thick. But I imagine if all you had was thinner sheets, you could cut two or more sheets and glue them together.
I needed a template before slicing into the foam so I made one using cardboard.

So I sketched out a freehand template on cardboard, not bad huh?
But as soon as I started to cut the cardboard with an exacto knife, it was so tough and it was taking forever. Plus, knowing that I had to cut through this cardboard and then cut the foam too, I just took my chances with cutting the foam freehand without the cardboard template.
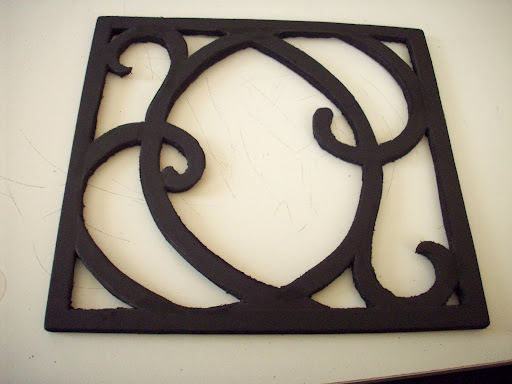
Using pencil, I drew the design on the foam and then used an exacto blade to make the cuts.
The pencil shows up well on the foam even though the foam is black.

I was so happy it was turning out great.
Now for those jagged edges.

The scissors I used did not help much with trimming.
So, bing!, I had an idea to use sand paper to smooth the edges. It did the job well.
This was turning out to be sort of a sculpting project but my background in clay and pottery really enjoyed this step.
This next step wasn't necessary but it gave it a finished look.
I spray painted it using Rust-Oleum black metallic spray paint.
Lastly I placed scrapbook paper behind it. I'm still not sure if I will hang as it is or place it in a frame like my inspiration photo.
Also, I can't wait to try other designs. It would look great carved with an initial too.
Linking to...